Use email-oauth2-proxy to handle GMail's OAuth2 authentication giving imap-backup access without the use of passwords which are considered unsafe by Google
GMail and Office 365 provide access to user email accounts via OAuth 2 authentication.
OAuth is a useful system to manage third parties access to a user's data, but when it's the user who wants to access their own data, it's more laborious than simply using a password.
GMail does allow the use of passwords to access accounts, but their use is considered unsafe, and they may be disabled at some time in the future.
imap-backup does not handle OAuth, so to back up GMail accounts you can use email-oauth2-proxy.
What's Needed
You'll need to create some GMail credentials, then install and configure email-oauth2-proxy and finally install and configure imap-backup.
To create the GMail credentials, you can follow the official guide. It takes a few minutes to set up, but once you get everything right, you obtain a client id and secret.
For the official email-oauth2-proxy setup procedure, see the email-oauth2-proxy getting started documentation. It offers two methods: either you clone the Git repository or you download a release.
Install email-oauth2-proxy by Cloning the Repository
To install via the Git repository, you'll need git and Python >= 3.6.
git clone https://github.com/simonrob/email-oauth2-proxy
cd email-oauth2-proxy
python -m pip install -r requirements.txt
Proxy Configuration
email-oauth2-proxy loads a file called emailproxy.config which should be in the same directory as the program itself (emailproxy.py).
The repository comes with an example configuration file.
For GMail, you only really need this to get started:
[IMAP-1993]
server_address = imap.gmail.com
server_port = 993
local_address = 127.0.0.1

[YOUR_EMAIL@gmail.com]
permission_url = https://accounts.google.com/o/oauth2/auth
token_url = https://oauth2.googleapis.com/token
oauth2_scope = https://mail.google.com/
redirect_uri = http://localhost
client_id = YOUR_CLIENT_ID.apps.googleusercontent.com
client_secret = YOUR_SECRET
email-oauth2-proxy modifies this file to store tokens.
First Use
Now, start the proxy
python emailproxy.pyYou should see a taskbar icon, like this:
The GMail proxy is now running on port 1993.
imap-backup Configuration
To get started with imap-backup, you can use the new single backup command:
imap-backup single backup \
  --email YOUR_EMAIL@gmail.com \
  --password "" \
  --connection-options '{"port": 1993, "ssl": false}' \
  --server 127.0.0.1 \
  --path my_backup
This command will block.
Click on the proxy's taskbar icon, then on "Authorise account" and then on your email address.
This will open a browser window to carry out the OAuth authentication and authorization.
As the GMail API credentials you have created have not been verified, Google will try to dissuade you from continuing:
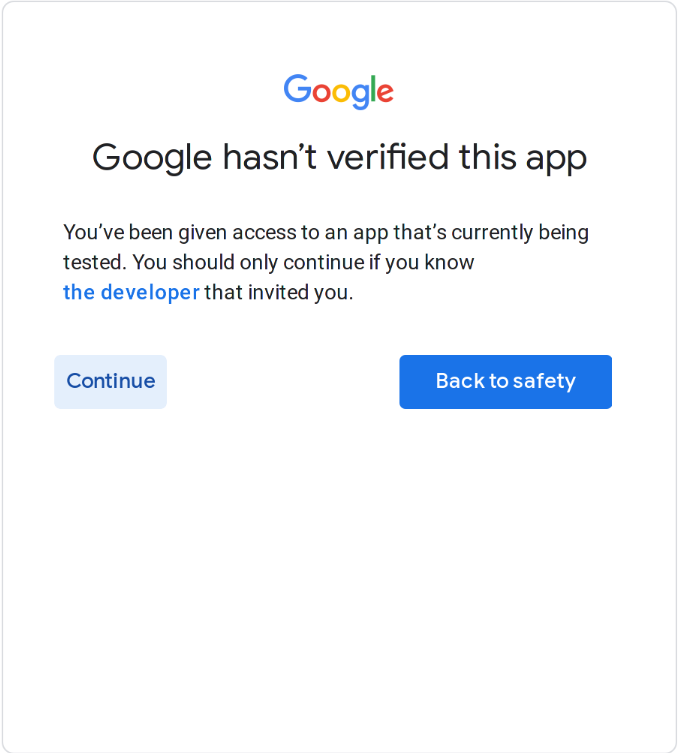
Just click on 'Continue' here.
Once you have completed the OAuth flow, imap-backup will get unblocked and will run your backup.
File-based imap-backup Configuration
As an alternative to the invocation above, you can configure the account via imap-backup's setup procedure:
imap-backup -c my-imap-backup-config.jsonThe account setup screen will be as follows:

Notice the connection options value, which sets the port and disables secure connections.
Headless Usage
You'll probably want run imap-backup in a non-interactive way, for example via a cron job.
If so, it is better to run the proxy in the same way - without the need for your intervention.
As long as you have already done the authorization flow, just run the proxy adding the --no-gui parameter:
python emailproxy.py --no-guiThat's it!
Following this process will allow you to back up your GMail accounts in a fairly painless way.
It's certainly more laborious than using email + password, but once you've done the setup on Google Console the rest is quite straightforward.